
As a lover of DIY projects and interior design, I’m excited to share with you a step-by-step guide to creating your own Japandi-inspired wall art. Japandi is a fusion of Scandinavian and Japanese design, emphasizing minimalism, natural elements, and functionality. By following these simple steps, you can add a personalized touch to your home while staying true to the Japandi aesthetic.
Key Takeaways:
- Create your own unique Japandi-inspired wall art to add a personal touch to your home
- Japandi interior design emphasizes minimalism, natural elements, and functionality
- By following these steps, you can achieve a harmonious balance of Scandinavian and Japanese design in your home
Understanding Japandi: The Perfect Fusion
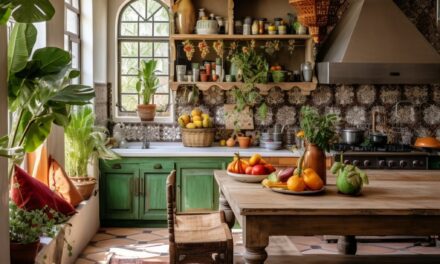
When it comes to home decor, the Japandi style has been gaining popularity in recent years as a perfect fusion of Japanese and Scandinavian design elements. This minimalist style is focused on simplicity, clean lines, and natural materials, making it a popular choice for those who prefer a calming and uncluttered space.
The Japandi interior design combines the functionality and simplicity of the Scandinavian style with the traditional elements and natural materials of Japanese design. This results in a unique aesthetic that emphasizes the beauty of imperfection, asymmetry, and organic shapes.
The Japandi style is all about creating a harmonious and balanced atmosphere, where every element has its own place and purpose. The focus is on quality over quantity, with the use of sustainable and eco-friendly materials that reflect the connection to nature.
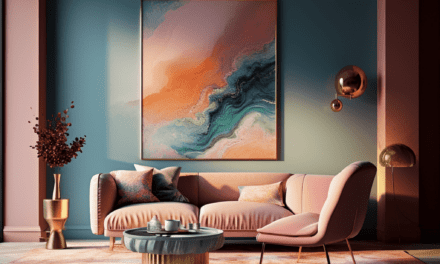
One of the most popular aspects of the Japandi style is minimalist wall art. This type of wall art includes clean lines, geometric shapes, and soft neutral colors that can add a touch of elegance and simplicity to any room. It can also include organic elements, such as dried flowers or driftwood, to bring a natural feel indoors.
Overall, the Japandi style is a perfect fusion of two cultures, highlighting the best of both worlds while creating a unique and calming space.
Finding Inspiration: DIY Wall Art Ideas
One of the most exciting parts of creating DIY Japandi Wall Art is finding inspiration for your design. There are countless possibilities for incorporating the minimalist, natural aesthetic of Japandi into your artwork. Here are a few ideas to get you started:
- Geometric Shapes: Using clean lines and shapes is a staple of Japandi design. Try creating a piece with simple shapes like triangles, circles, or squares to achieve a modern look.
- Botanical Prints: Bring the beauty of nature into your artwork by incorporating botanical prints. You can use pressed flowers, leaves, or branches to create an organic, earthy feel.
- Texture Play: Experiment with different materials to add texture to your artwork. Incorporate fabrics, yarns, or natural fibers like jute or sisal to create a tactile piece that adds depth and interest to your space.
- Minimalist Landscapes: Use a limited color palette and simple shapes to create a minimalist landscape. A Japanese-style landscape with a mountain or water element creates a peaceful, meditative feel.
- Abstract Shapes: Try creating abstract shapes with a focus on simplicity and balance. Use neutral colors and negative space to create a calming piece of art that complements your Japandi decor.
Don’t be afraid to think outside the box and experiment with different techniques and materials. The beauty of DIY Japandi Wall Art is that it’s customizable and unique to your personal style and taste. Remember that inspiration can come from anywhere, so keep an open mind and let your creativity flow.
Getting Started: Essential Materials and Tools
Before we dive into creating our DIY Japandi Wall Art, let’s first gather the essential materials and tools we’ll need for this project. The great thing about this project is that it’s customizable to fit your personal style. You can use a variety of materials and tools to create your unique Japandi-inspired wall art.
Here’s a list of basic materials that you might need:
- Canvas or board (depending on your preference)
- Paints (acrylic or watercolors)
- Paintbrushes (wide and narrow)
- Sandpaper (120 grit)
- Primer (if using a canvas)
- Measuring tape
- Pencil and eraser
- Scissors
- Painter’s tape
Don’t be afraid to experiment with materials beyond the basics. Consider incorporating wood, fabric, or natural fibers such as rattan or jute to add texture and depth to your Japandi wall art.
Now let’s talk about the essential tools required for this project:
- Hammer and nails or hanging strips (depending on your preference for hanging the artwork)
- Screwdriver and screws (if hanging on a wood surface)
- Level (to ensure your artwork is hanging straight)
It’s important to use tools that you are familiar with and that you feel comfortable using. Safety first! Remember to wear protective gear such as gloves, goggles, and a mask when necessary.
Now that we have all the materials and tools at hand, we can move on to preparing the canvas.
Step 1: Preparing the Canvas
Before we begin creating our DIY Japandi Wall Art, we need to prepare the canvas. Start by laying the canvas flat on a clean surface and inspecting it for any defects. If there are any bumps or dents, use sandpaper to smooth them out.
Next, apply a layer of gesso or primer over the entire canvas. This will create a smooth surface for the paint to adhere to and prevent it from sinking into the canvas fibers. Allow the gesso to dry for at least an hour, or as directed on the label. If necessary, apply a second coat of gesso to ensure full coverage.
Once the gesso is fully dry, lightly sand the surface with fine-grit sandpaper to remove any bumps or rough spots. This will create a smooth surface that is perfect for your Japandi-inspired artwork.
Step 2: Choosing the Color Palette
When it comes to Japandi interior design, color plays a crucial role in creating a calming and harmonious atmosphere. To achieve a minimalist look, it’s important to choose a color palette that reflects the simplicity and natural elements of the Japandi style.
Start with Neutrals: Neutral tones like white, beige, and gray are excellent base colors for your Japandi wall art. These colors offer a clean look and allow for other colors to pop. You can also add pastel colors for a hint of warmth and tranquility.
Incorporate Natural Elements: In Japandi interior design, nature is an important source of inspiration for color palettes. Greens, blues, grays, and browns are some common color choices inspired by nature. You can also add pops of colors like yellow or pink inspired by flowers or other natural elements.
Consider Light: Lighting plays an important role in the appearance of your Japandi wall art. Choose colors that look good in natural light and understand how artificial light affects color and mood.
Use Colors Sparingly: Remember, simplicity is key in Japandi interior design. Use colors sparingly and in a way that complements the overall composition of the artwork.
With these considerations in mind, you can create a color palette that reflects the beauty and tranquility of the Japandi style. Let your creativity flow and experiment with different shades and combinations until you find the perfect color palette that suits your DIY Japandi Wall Art project.
Step 3: Embracing Simplicity: Designing the Artwork
Now that the canvas is ready and the color palette has been chosen, it’s time to start designing your DIY Japandi Wall Art. The key to creating minimalist wall art is to embrace simplicity and keep the design clean and uncluttered.
One technique for achieving this is to focus on clean lines and geometric shapes that reflect the Japandi aesthetic. Consider using a ruler or straight edge to create sharp lines, or experiment with different shapes to create a unique and abstract pattern.
If you’re feeling adventurous, try incorporating negative space into your design. This technique involves intentionally leaving blank space on the canvas to create a sense of balance and harmony in the artwork.
Remember that less is more when it comes to minimalist wall art, so avoid adding too many details or elements that may clutter the design. Stick to the Japandi philosophy of simplicity and functionality, and let the natural beauty of the materials and colors shine through.
Adding Texture
While minimalist designs tend to be sleek and smooth, adding texture to your DIY Japandi Wall Art can create a sense of depth and interest. Consider using materials like wooden beads, fabric scraps, or natural fibers to add a tactile element to your artwork.
Another option is to experiment with different paint techniques, such as creating a layered or textured effect with a dry brush or sponge. This can add dimension and visual interest to your minimalist design.
Remember to keep the texture subtle and balanced with the rest of the design, so as not to overwhelm or distract from the overall aesthetic.
In the next section, we’ll explore ways to incorporate organic elements into your DIY Japandi Wall Art, bringing a touch of nature indoors and enhancing the Japandi aesthetic even further.
Step 4: Bringing Nature Indoors: Adding Organic Elements
One of the defining characteristics of the Japandi style is the use of natural elements in interior design. Incorporating organic materials into your DIY Japandi Wall Art can add depth and texture to the piece, making it stand out as a focal point in your space.
There are many ways to add natural elements to your wall art, depending on your personal style and the materials you have on hand. Here are a few ideas to get you started:
| Idea | Description |
|---|---|
| Dried Flowers | Using dried flowers and foliage can add a touch of elegance to your piece. Pressed leaves or flowers can be used as accents, or you can create a floral arrangement in the center of the canvas. |
| Bamboo | Bamboo is a popular material in Japanese decor, and can be used to create a unique, textural effect in your wall art. You can cut the bamboo into thin strips and weave them together, or use larger pieces to create a minimalist design. |
| Driftwood | Driftwood is a beautiful, weathered material that can add a rustic touch to your artwork. You can use small pieces as accents, or create a larger composition using different shapes and sizes. |
Remember, the goal is to create a cohesive piece that reflects the Japandi aesthetic. Be mindful of the materials and colors you choose, and make sure they complement each other and the overall design of your space.
Adding natural elements to your DIY Japandi Wall Art can take it to the next level, elevating it from a simple decor piece to a work of art that reflects your personal style and creativity.
Step 5: Putting it Together: Assembling the Wall Art
Now that your DIY Japandi Wall Art is complete, it’s time to assemble and hang it in your desired space. Follow these simple steps for a polished finish:
- Start by laying your canvas face down on a clean and flat surface.
- Attach a hanging wire or hook to the back of the canvas, making sure it is centered and secure.
- Use a level to ensure the wire or hook is straight and even.
- Decide on the placement of your artwork before mounting it onto the wall.
- Using a pencil, mark the wall where the top of the canvas will be placed.
- Hold the canvas up to the wall, making sure it aligns with the pencil marks.
- Attach screws or hooks to the wall where the pencil marks are located.
- Hang the canvas on the wall, adjusting it until it is centered and level.
Congratulations! Your DIY Japandi Wall Art is now ready to admire and enjoy. By incorporating organic elements and minimalist designs, you have created a unique and stylish piece that reflects the beauty of Japandi interior design.
Final Thoughts: Showcasing Your DIY Japandi Wall Art
Congratulations, you have successfully completed your very own DIY Japandi Wall Art piece! Not only have you saved money, but you have also added a personal touch to your home decor that reflects your creativity and style.
Now, it’s time to showcase your masterpiece! There are endless possibilities on where to display your artwork, whether it be in your living room, bedroom, or even in your home office to add a touch of inspiration.
One of the best things about creating your own art piece is the freedom to customize it based on your preferences. You can play around with different color palettes and designs to match the existing decor in your home.
Remember, DIY Japandi Wall Art is just one of many DIY home decor projects you can take on. The possibilities are endless, and the satisfaction you’ll get from creating something with your own two hands is priceless.
So, go ahead and show off your creativity, and feel proud of the unique piece you have created!
FAQ
Q: What is Japandi interior design?
A: Japandi interior design is a fusion of Scandinavian and Japanese styles, combining the minimalism and functionality of Scandinavian design with the simplicity and Zen aesthetic of Japanese design.
Q: What materials and tools do I need for DIY Japandi Wall Art?
A: Basic materials include canvas, paint, brushes, and optional materials like wood, fabric, or natural fibers. You will also need sandpaper, primer, scissors, and adhesive for assembly.
Q: How do I choose the color palette for my Japandi Wall Art?
A: Choose calm, neutral tones as a base, and add pops of color inspired by nature. Consider earthy tones, muted pastels, or shades of grey to achieve a harmonious Japandi aesthetic.
Q: Can I incorporate natural elements into my DIY Japandi Wall Art?
A: Absolutely! Natural elements like driftwood, dried flowers, or bamboo can add a touch of nature and enhance the Japandi vibe of your wall art.
Q: What are some tips for designing minimalist Japandi Wall Art?
A: Embrace simplicity by creating clean lines, geometric shapes, or abstract patterns. Focus on the beauty of simplicity and let negative space play a key role in your design.
Q: How do I assemble the DIY Japandi Wall Art?
A: After completing your artwork, mount it securely on the wall using appropriate hardware. Consider adding final touches, such as a protective sealer or frame, to complete the look.